-
Class Invitations
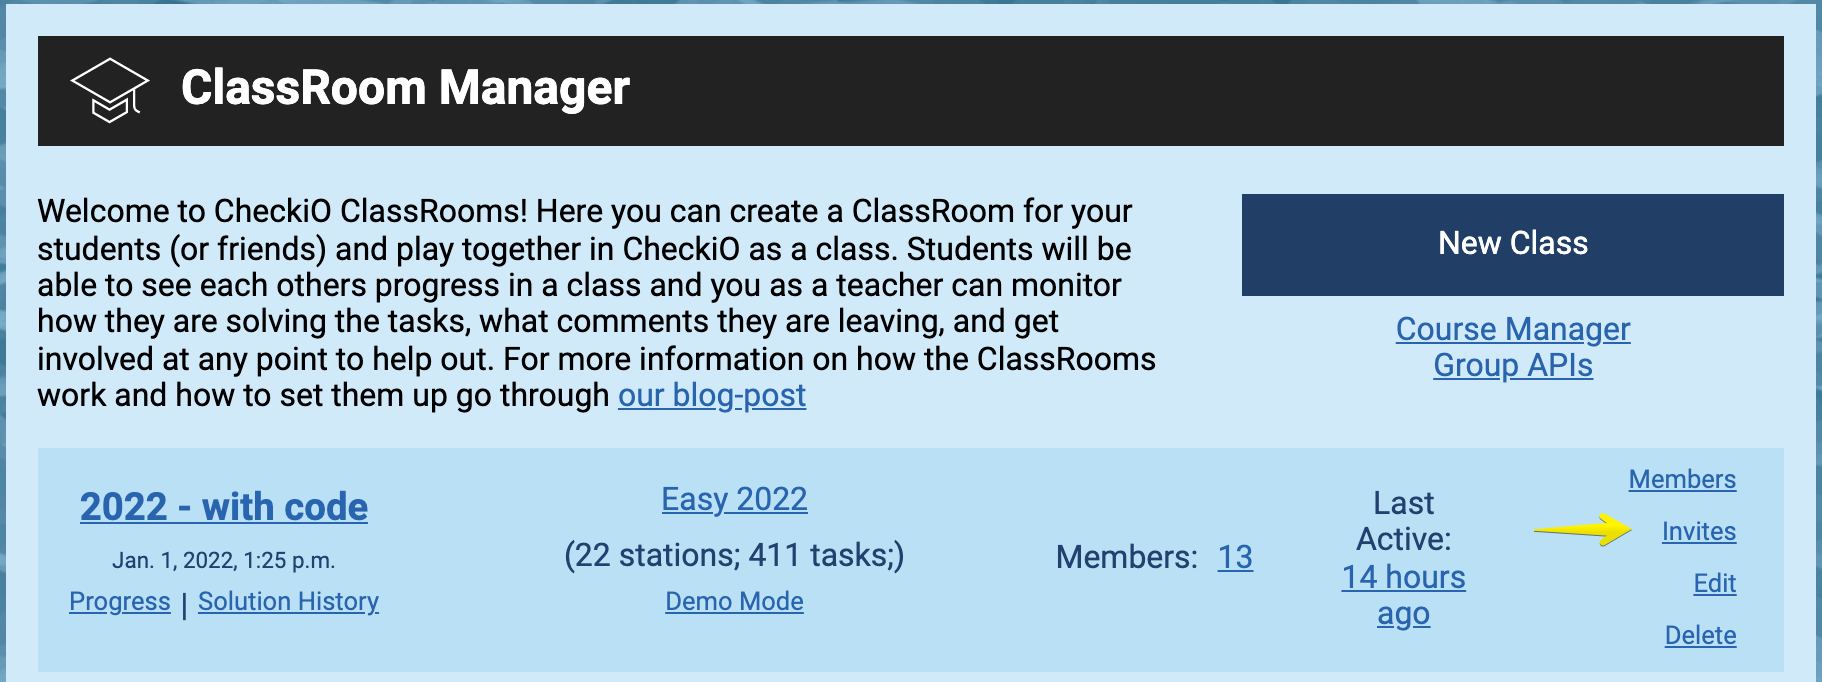
Another useful section is called “Invites”. We’ve already mentioned some information about it before, when talking about the process of creation of the class. You can get to this section on the right panel and through the ClassRoom Manager in the classes’ list.
This page shows all of the invitations that you’ve sent,
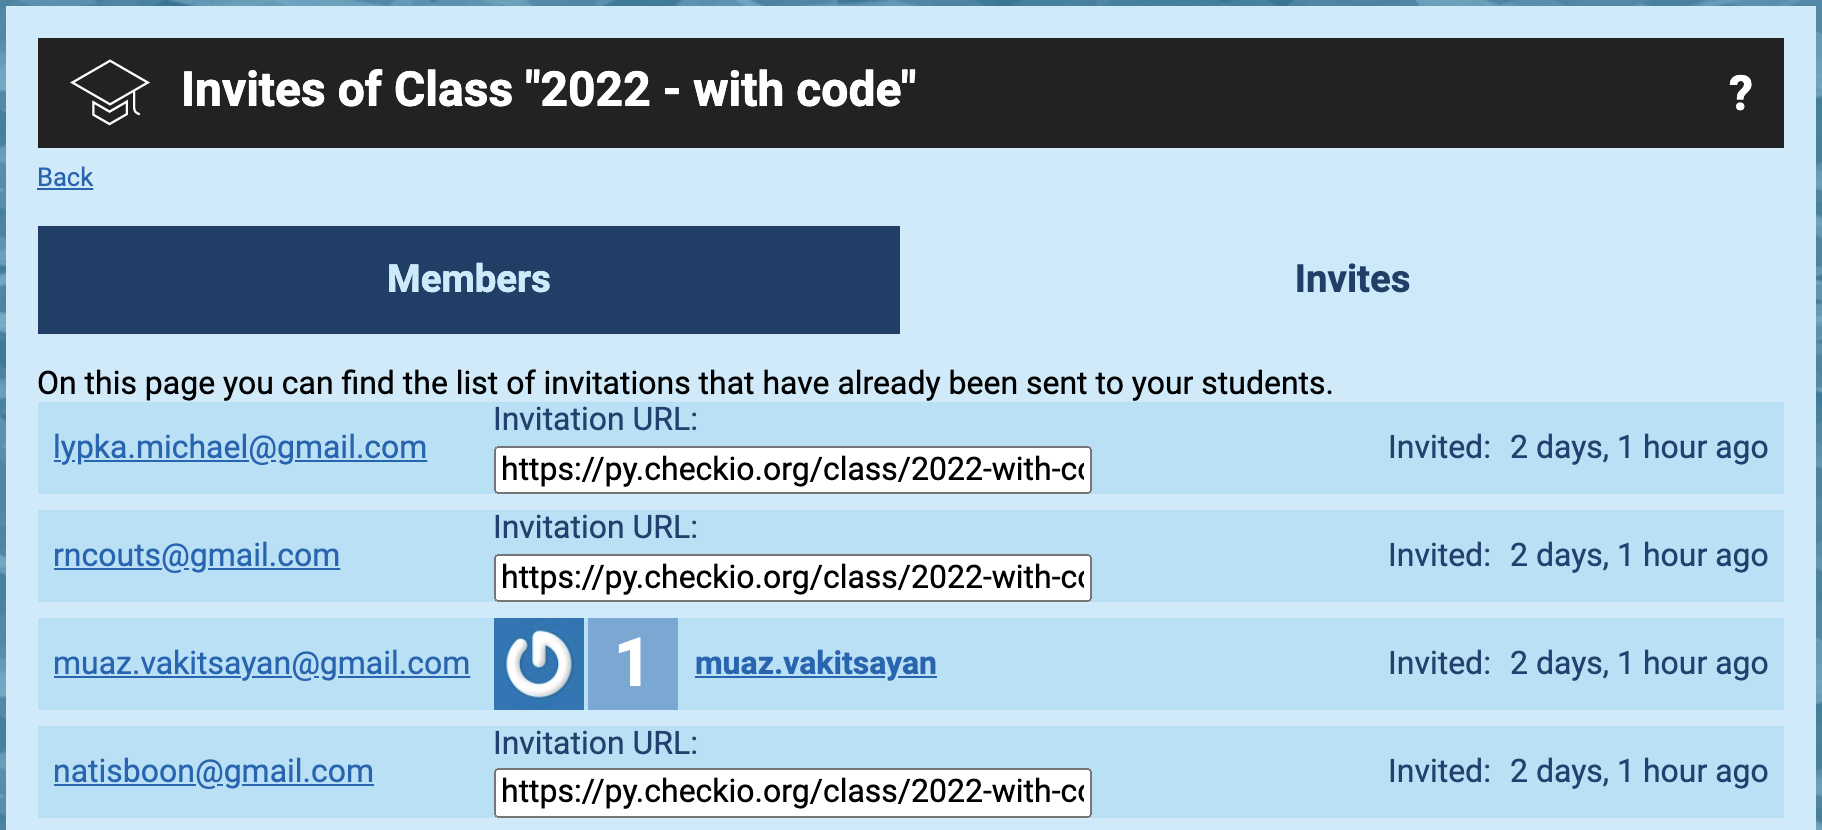
In case a particular user didn’t get an email from CheckiO (which can happen for different reasons), you can simply copy the link presented on the “Details” page opposite that user and send it to him or her via some other app, like the Facebook Messenger, Viber, WhatsApp, Skype, etc. By following that link a person will be able to proceed with the registration process and be added to the class.
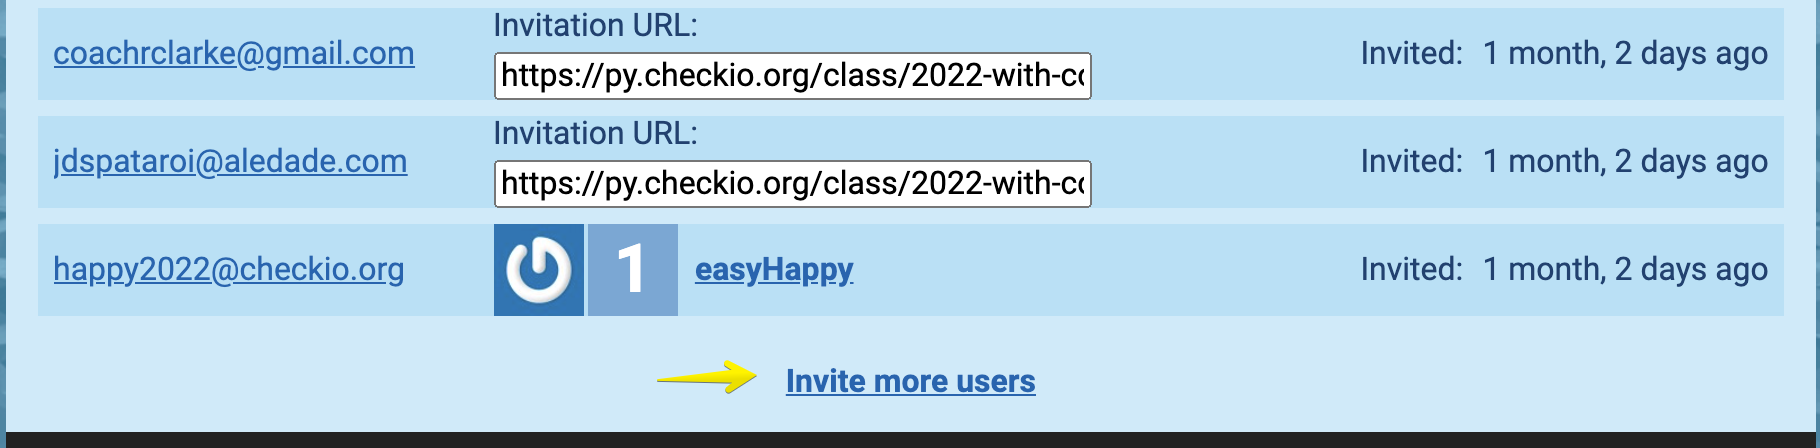
If you want to send another set of emails, you can click on the “Invite more users” on the bottom of the page and you’ll get to the “Invite to Class...” page (we’ve already talked about that when explaining the registration procedure during the creation of a class).
if you choose "Anyone but the approval is required" for option "Who can join" in Class Settings, you can use the given link and share it with the users you want to join your class. Or you can use emails on CheckiO.

To invite students by email you need to feel two fields - Text of the invitation and list of emails you want to send that invitation (Name for every email is optional).
Hit the preview button to confirm all the data is correct.
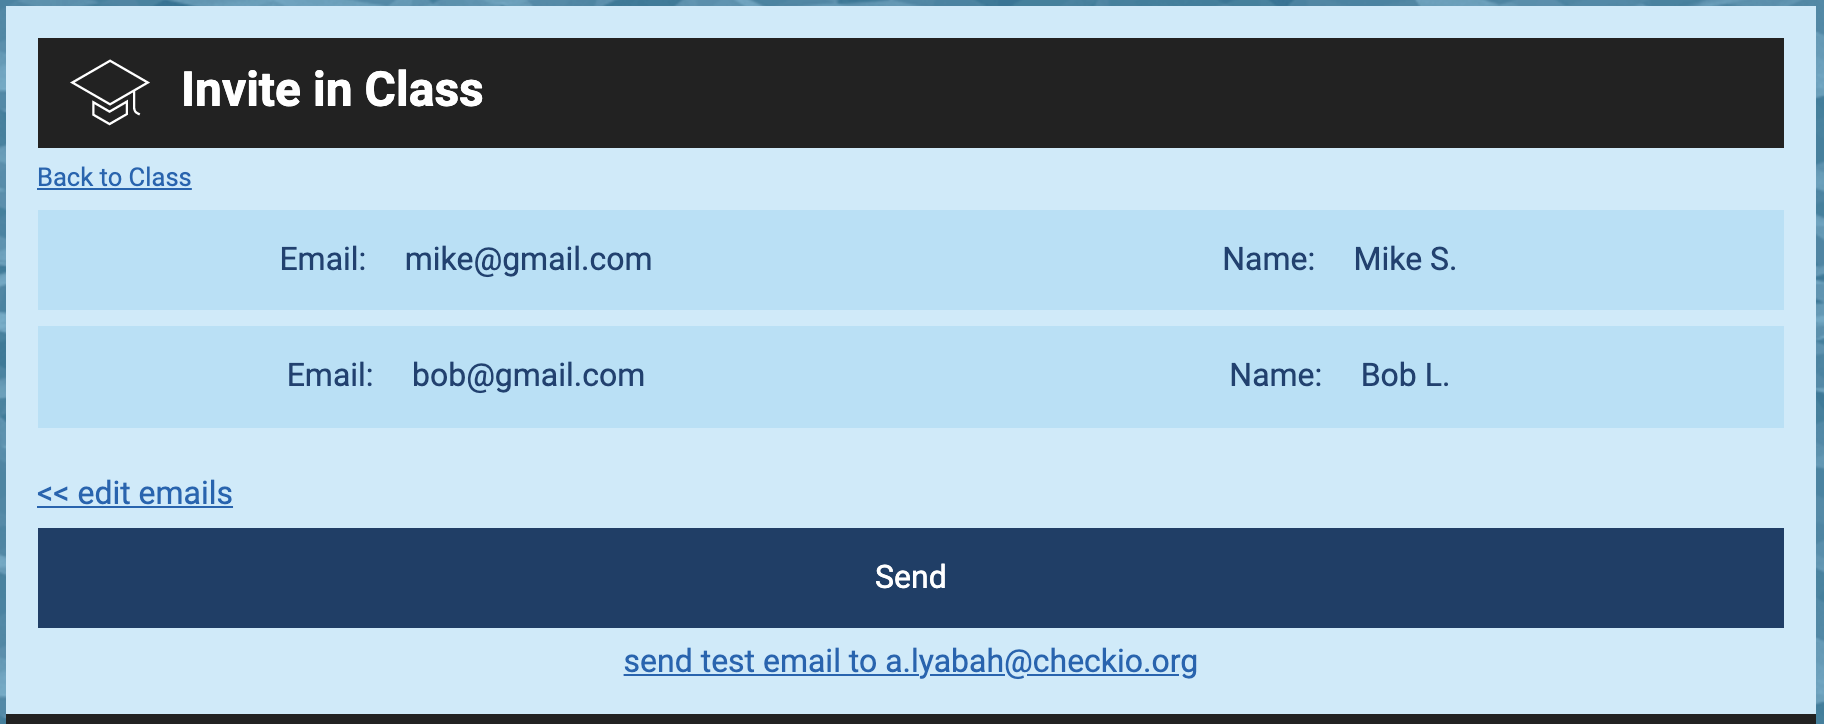
If all of the data is correct on the preview page - hit "Send".
You can also send a test email for yourself to make sure the email looks correct. (The link bellow "Send" button)
So, after creating and sending the emails, this set will appear on the “Invites of Class” page. There you can keep you hand on the pulse, and monitor the progress of how people are joining and so on.
In the next article we'll learn how to quickly find out what’s new with your students.